I have made some significant progress in getting the Oculus Rift CV1 to work with T3D.
As stated previously, I am using the Dx11/Open VR build from HERE. I am also using the latest OpenVR SDK, and the example project given in my recent blog post as well.
The first thing that caught me was that it is necessary to install and configure (go through the on screen tutorials) for both the Oculus Runtime App and the SteamVr/Open VR app. I had not done this, and it was the reason why head tracking was not working in T3D until I fixed it.
I am also encountering some issues which I believe are related to DirectX 11. These occur somewhat intermittently. I have noticed an issue caused by running T3D in fullscreen mode (This is not, apparently, necessary for the T3D project to work properly on the rift) and sometimes I get an error connected to the “VR compositor”.
Restarting the Oculus processes (there are several of them) and the Steam VR process can solve most of these errors, but I have noticed that some still remain. I am still working on this, and it is likely that the Dx11/Open Vr codebase will not be fully stable until T3D 3.9 is released.
However, I now have the Open VR demo project working, with head tracking. I now simply need to enable gamepad support, and then I can begin copying the changes from this project to my own Virtual Environment Project (p171).
D3DTest 08/06/2016 , 11:03:27 PM Torque 3D MIT – D3DTestD3DTest 09/06/2016 , 04:51:17 AM Torque 3D MIT – D3DTestD3DTest 09/06/2016 , 04:50:07 AM Torque 3D MIT – D3DTest
Creating a Model in either the Steam edition or the Adobe Creative Cloud edition of Mixamo Fuse Character Creator is very simple.
To get this character, and it’s animations, into T3D, is also, thankfully, simple.
First, the model must be uploaded to the Mixamo website. From here, an animation pack can be easily created from the large database of animations.
There are a few things to bear in mind here. Firstly, the “in place” checkbox should be ticked for all animations, particularly walking, running, and other animations where the character is moving in the world. If this is not done, the characters movement in the world will not sync up with their movement in the animation, and this will look horrible. The “In place” check just makes them run, walk, or jump on the spot, so all movement in the world is handled by the games engine.
Secondly, it is important to include animations that have a smooth transition. For example, an animation that has the character sitting on a chair but doesn’t animate them actually sitting down from a standing position, is going to look bad when it suddenly transitions from standing to sitting with nothing in between.
Once the animation pack has been created, it can be “queued for download” and then downloaded.
The download pack contains the base mesh as one file, and the individual animations themselves as separate files in the directory. For mixamo fuse models, the textures are also located in a folder called “textures”. This directory can be copied anywhere into T3D’s folder structure.
Setting up the model in T3D is very simple. I have been using the shape editor gui, but this could be done from script as well, in the characters on::Load() function.
First, using the world editor, load the characters base mesh into T3D, and give the material a name. Then, in the shape editor, if necessary, point T3D to the folder where the textures are stored. This will need to be done for each material, if the materials don’t show up automatically.
To add the animations, click on the “seq” (sequence) tab, and then click on the “new” icon (between the save and delete buttons). From here, the sequence can be named, and by clicking on “source” and then “browse” it is possible to select one of the animations provided in the Mixamo download. Simply repeat this for any other animations, bearing in mind that some animations require the use of particular names to work properly, such as “run”, “walk”, “idle”, etc.
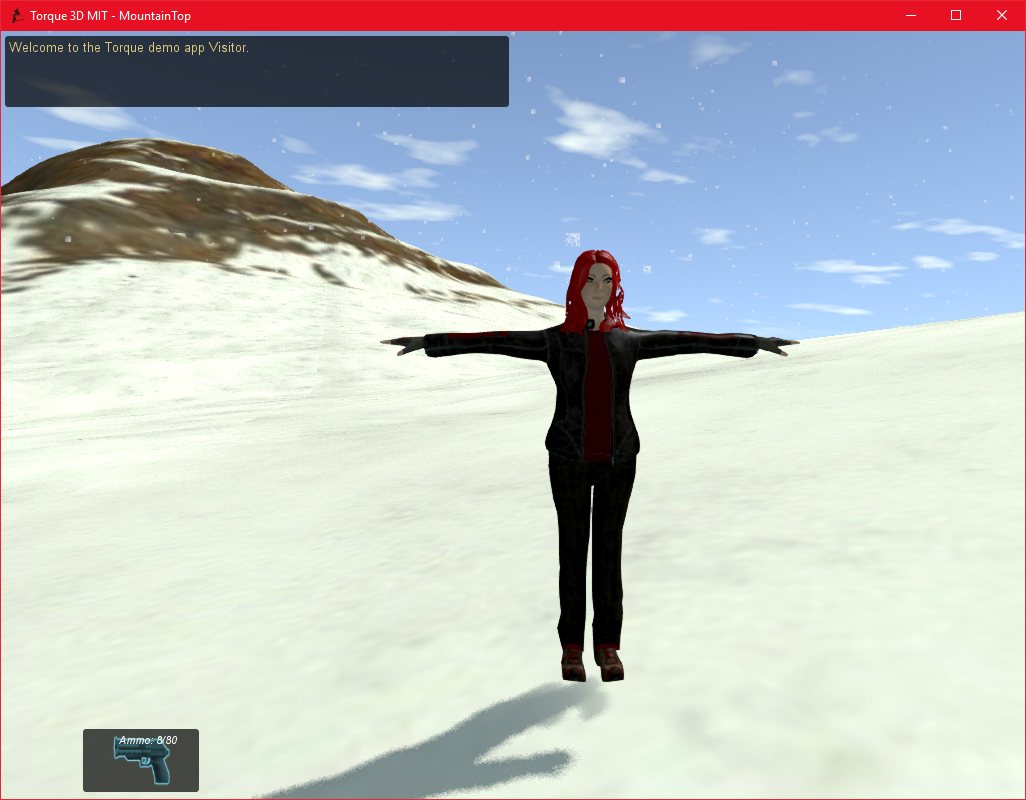
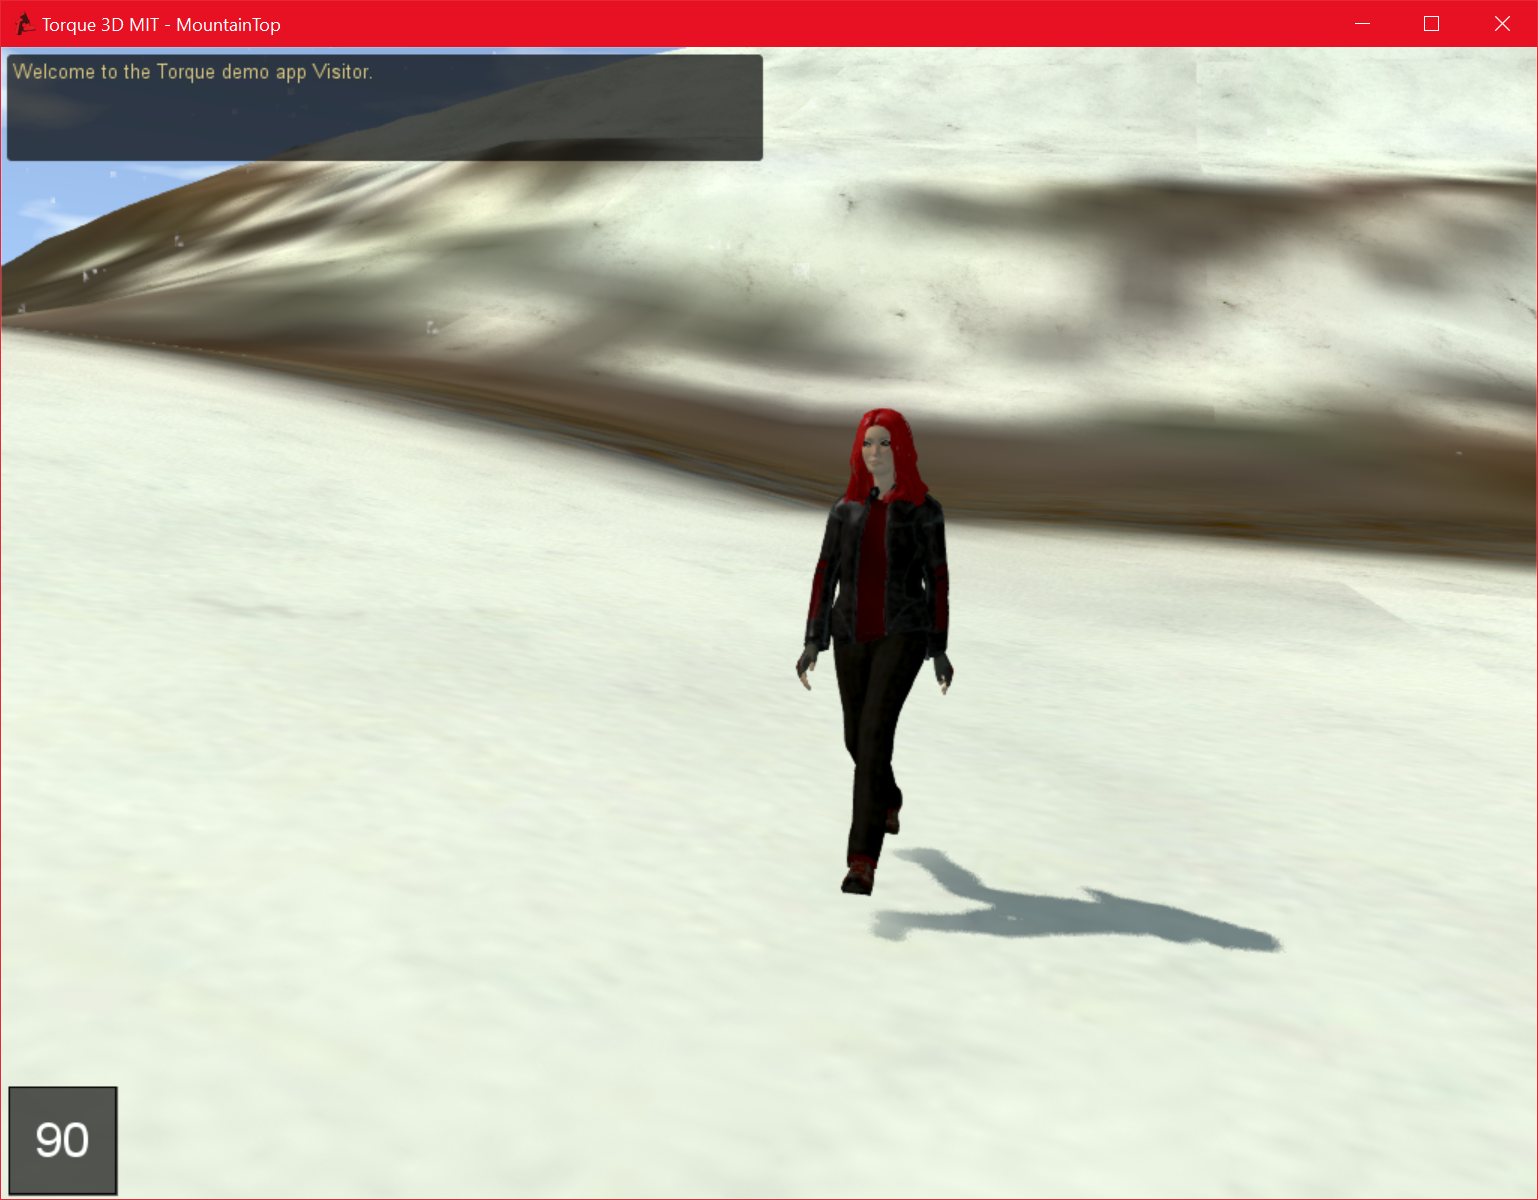
MountainTop_DEBUG 10/06/2016 , 01:50:31 AM Torque 3D MIT – MountainTopMountainTop_DEBUG 10/06/2016 , 01:43:48 AM Torque 3D MIT – MountainTopMountainTop_DEBUG 10/06/2016 , 01:44:23 AM Torque 3D MIT – MountainTopchrome 07/06/2016 , 06:18:52 AM Mixamo – Google Chrome [SCM]actwin,1908,542,1921,1041;MountainTop_DEBUG 07/06/2016 , 06:02:01 AM Torque 3D MIT – MountainTopMountainTop_DEBUG 07/06/2016 , 06:18:47 AM Torque 3D MIT – MountainTop
I have recently begun the task of getting Oculus Rift support working in T3D. It seems that many of the tutorials and guides on the internet are out of date, so hopefully this post will be of use to someone.
Firstly, I have discovered that the Oculus SDK is not actually used with T3D. Instead, the OpenVR SDK (SteamVR) is actually used, since this support both the HTC vive and the Oculus Rift.
Another issue is that the latest release of T3D (3.8) still uses Directx 9, while the Rift Requires at least DirectX 11. Fortunately, there are builds of T3D which have DirectX 11 and Open VR support. This are mainly aimed at a future T3D 3.9 release, but they are functional, although I have found the DirectX 11 support a little rough around the edges.
The latest DirectX 11/Open VR build is HERE Github). The latest OpenVR SDK can be found HERE.
The steps to include OpenVR are:
Use the Torque Project generator to add the modules “Extended Move” and “DirectX 11” to a chosen project.
Regenerate the solution.
Then add the Includes for Open VR (Making sure to add the OpenVR_api.dll to the games executable directory as well).
In visual studio 2015, I noticed that I had to use “retarget solution” after regenerating the projects, but this did not cause a problem.
This solves the code side of the problem.
On the script side, the official tutorial is also out of date, since it relies on hooking into the Oculus SDK. A sample DX 11/Open VR T3D demo can be found HERE.
Copying this project would probably be the easiest way to implement the OpenVR script changes.
I have completed my integration of the great mySQL tutorial from my previous post (HERE).
I have left it at a fairly basic level, because the rest of the integration will be dependent on the individual applications it is being used for.
To integrate this resource, follow the following steps:
First, set up your actual mySQL database, verify that ports are forwarded, etc, this is beyond the scope of this tutorial.
Second, install and run the mySQL ODBC connector from HERE. According to the tutorial in my previous post, it is important to use the 32-bit connector, even on a 64-bit machine. The tutorial (available HERE) also covers how to set up this connector.
Thirdly, download my modified mySQL.cpp file from my site HERE.
Add it to your project, and that should be all you need to do.
querydatabase() has code in it that is more for testing than production, but it does show how to implement key features.
Freeing up resources and closing the connection is also something that could be optimised further, depending on how a developer wanted their application to run.
I have made four functions available to script:
connecttodatabase(“username”,”password”);
querydatabase(“sqlquery”); //such as: querydatabase(“SELECT * from users”);
Having recently upgraded to a new 4K monitor, I noticed that my previous screenshot tool was no longer working. It was only capturing a portion of the image. This is likely due to tool not being capable of handling the new resolution.
There are a few options within Windows 10 to take screenshots, but they don’t seem to work too well. The default option (Windows key and PrintScreen) takes a screenshot of all monitors at once, which is not suitable if you just want to capture the active window.
I eventually found “screenshotcaptor” which is a free and very powerful screen shot tool. It supports windows 10, multiple monitors, and high resolution monitors. It also has a huge array of customisation options, and even a built in image editor.
I was able to change the key used to capture the active window (by default, printscreen is used to capture the entire screen, and alt printscreen is used to capture just the active window, I wanted one-button capturing of the active window). I was also able to customise the name format of my output images. So, I have “Phoenix Game Development <date/time>” for each one. This is very useful when capturing images for a website of blog, since a lot of traffic comes from image searches, so having the name of your blog in the image name is basically free advertising.
Something else this program does that my previous program didn’t is that it can take screenshots from all monitors, not just the primary display. There are a whole host of other options in this program, which I haven’t changed yet.
Having recently moved to Windows 10, I had to solve a few fairly minor issues when compiling Torque using the new 2015 edition of Visual Studio 2015. The current version of T3D (3.6.1) seems to compile fine, however, projects built with older versions don’t.
Since I’m sure many developers, like me, are still working with older versions of the engine for various reasons, I decide to create this brief guide to outline how I solved these compiling and linking issues.
Firstly, there will be a lot of errors relating to cstdlib. This is the Standard Library. The problem here is that the new version of cstdlib has a function named “strtok” which conflicts with an identically names function in torque. To fix this, simple navigate to “engine/source/core/strings/stringFunctions.h”.
At line 38, change “#define strtof” to something else. This removes the conflict, and should fix most of the errors.
The second change to make is in “engine/lib/collada/src/dae/daeElement.cpp”. This file complains about a function “max” not being found. This is because the function, once a part of “xutility” has now been removed.
To solve this, simple add this function:
// ALGORITHM STUFF (from <algorithm>)
// TEMPLATE FUNCTION max
template<class _Ty> inline
const _Ty& (max)(const _Ty& _Left, const _Ty& _Right)
{ // return larger of _Left and _Right
return (_DEBUG_LT(_Left, _Right) ? _Right : _Left);
}
To daeElement.cpp, somewhere above line 475, where the only call to “max” appears (in “getNecessaryColumnWidth”.
If you are lucky, this is all you will need to do.
However, if you are unlucky, like I was, and you have third party libraries installed in T3D, you may get linker errors similiar to: “module unsafe for safeseh image”. What this means is that one of these libraries has been compiled using an earlier version of the compiler.
To fix this, either get an up to date version of the library, or go into:
“Project properties>Configuration Properties>Linker>Advanced” and disable “Image has safe exception handlers”.
This should be all you need to do.
I am progressing well with setting up my new machine, and I’m posting this from it.
I am still Enjoying Windows 10, despite some minor teething troubles (mostly involving me being unfamiliar with where the settings and options are).
I have installed the new version of Visual Studio Express (2015) and used it to compile the latest release of T3D. I had to install the June 2010 version of the DirectX SDK first though, since it is the latest version (The DX SDK is no longer current, but T3D still requires it).
I also isnstalled Skyrim, to see how well my machine performs in games. As expected, when starting Skyrim for the first time, I got this message:
“Skyrim will detect your video hardware and set options accordingly”
And this was the result:
If that’s not visible, it chose “ultra high quality” for the settings. Ignore the “Resolution” information, I am using a small monitor just to set up my new machine.
So far, so good. I am still figuring out how to use the new Windows 10 “Game bar” to take screenshots from in game, and on how to increase the resolution of the screenshot.
I also have a lot more software to install before I can switch to my new machine permanently.
I have completed the build of my new system, and have begun the configuration phase.
I had planned, initially, to install Windows 7 on the new machine, since that is what I am using on my development machine now. However, while conducting research, I decided to give Windows 10 a try. Windows 7 is now two operating systems behind the current standard (Windows 8 and 8.1) and so it is close to being “obsolete”. There are also installation issues with Windows 7 and Intel skylake chips when installing over USB, since Microsoft have removed support for an “EHCI host controller”. THIS site goes into much more detail. There are ways around this, such as installing from a bootable DVD, but this has it’s own problems, and optical drives themselves are becoming obsolete (on my current machine, I disconnected my Optical Drive for some reason, and didn’t realise it for over a year!).
I have heard relatively good things about Windows 10 (and some concerning things, regarding privacy) and I have decided to try it, and if I don’t like it, I can revert to Windows 7. From what I understand, Windows 7/8/8.1 users can upgrade to Windows 10 for free, so I won’t have wasted any money if I do go back to 7.
I had some issues getting a bootable USB stick working. The Microsoft “Media Creation Tool” took several hours to download the Windows 10 image, and then failed while writing that image to the USB stick (although this may have been due to issues with my antivirus, which I didn’t disable). I then tried to download the ISO manually, twice, but the download failed, likely due to the very slow download speed I was getting.
Eventually, I used the Media Creation Tool to download the ISO, and then used Rufus to burn that ISO onto a USB stick. This worked great, Windows 10 installed very quickly and with no hassle at all, and my first impressions of it are exceptionally good, it is a very slick, fast, and nice looking operating system. I have Windows 8.1 on my tablet, and I have to admit I don’t particularly like it, but Windows 10, at least from what I’ve seen so far, is a major improvement.
It seems to combine the best of Windows 8 and 8.1 with the best of Windows 7. I get my Start menu back, which is essential, but I also get a much more modern, more interactive user interface.
I have not been using it much yet, I still have to install a lot of drivers and updates, and then install and configure all of my software, so it will likely be a few days at least before I will be using it as my main machine, but so far, I am very impressed with Windows 10.
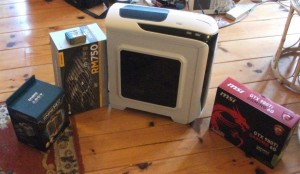
I have completed my new system build, with the exception of installing the hard disk/s and the Operating System, software, etc. This is a short account of the build.
In general, it was very fast and simple, with just one minor problem which I will mention below. The parts I chose were all correct, and were recognised correctly by the BIOS screen once the build was complete.
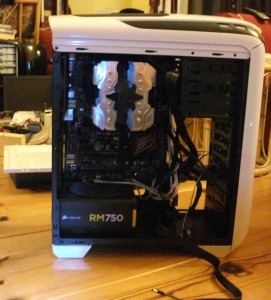
Some of the main parts of the system, from left to right: CPU Cooler, CPU, Power supply, case, graphics card.
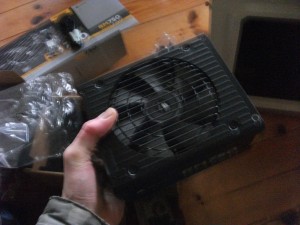
I decided to install the power supply and the mother board in the case first. This would normally be ok, but I made one slight over sight, which I will come to.
After some research, I decided to mount the powersupply facing up, with the fan facing into the case, even though my case has an exhaust port at the bottom, just under the power supply. This was because modern power supplies are designed to draw air in using the fan, and extract it out of the case through the rear. This means that having the fan facing up will help to extract warm air from the case. Since my graphics cards fans are directly over the power supply, this should mean that the warm air from the graphics cards and other components are more easily extracted out of the case. In addition, this will protect the power supply from sucking up dust from the floor beneath the case, which would cause problems for it. My power supply also has a very large fan, (which I chose in order to keep the system as quiet as possible without compromising cooling efficiency) and the exhaust port is designed for a smaller fan. This means if I mounted the power supply face down, it would block a large part of the fan, which could cause dangerous overheating issues.
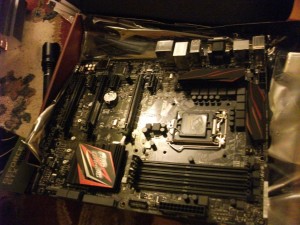
The motherboard. Generally, the CPU cooler should be attached to the CPU BEFORE the motherboard in installed in the case. With small stock coolers, it is usually fairly simple to install the cooler even when it is in the case, however, my Zalman CNPS14X Cooler is much bigger than a normal cooler, and I foolishly forgot to install this before the motherboard was in the case. I hadn’t installed the CPU yet, so I could have just taken out the motherboard and installed the CPU and cooler outside the case, but luckily I was able to take the top of the case off and make just enough room to install the Cooler properly without having to remove the board.
This was the only minor problem in the build.
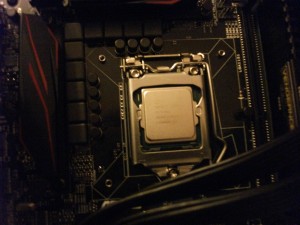
The CPU installed.
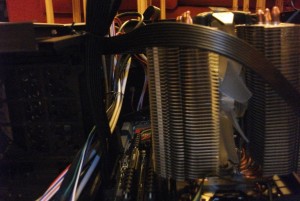
Assembling and installing the Zalman cooler was difficult, even without my added mistake of installing the motherboard in the case first. However, it will be much more efficient, and much quieter, than a stock cooler, so it will be worth it.
This shows the limited amount of room I had to work with. I had to install and tighten 4 bolts to the cooler from inside the case. In my defence, this may have had to be done anyway, since the bolts had to pass through the back panel of my computer case.
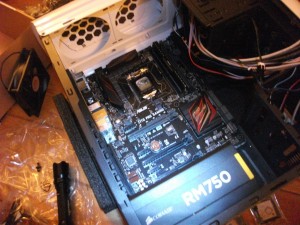
The cooler, finally, installed.
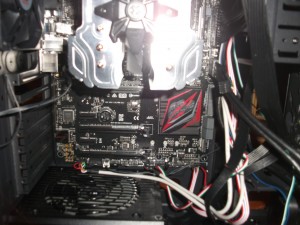
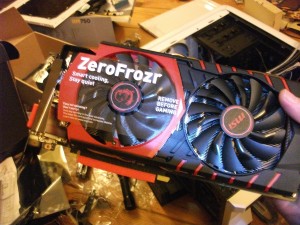
The most important component, the graphics card! This is an MSI GTX 980Ti with 6 GB’s of RAM. I was worried about fitting the graphics card into the case, especially with the added size of the huge Zalman cooler (I didn’t realise it was so big when I bought it), especially since my new case is a standard ATX case like my old one, and I had issues with fitting my old graphics card in. Luckily, I had measured properly, and, after rearranging some cabling, the card fitted in perfectly.
The reason, incidentally, why my old card had such trouble fitting, even though the case is the same size, is that my old case had a fan mounted in the side panel, and this protrudes into the case right where the power cables plug into the graphics card. My new case has all its fans mounted in the front or the back, not the side, so this wasn’t an issue. I would recommend not buying cases with side mounted fans if using an oversize graphics card, for this reason.
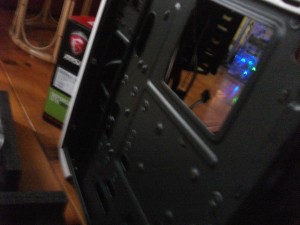
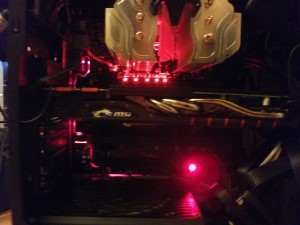
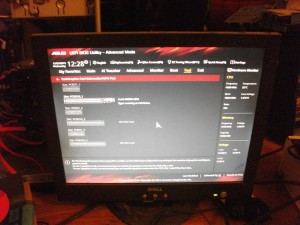
The system up and running! The red lights are on the mother board, and I believe they can be customised and changed by an Asus control panel, I haven’t looked into this yet. The blue lights are case lights.
The system is incredibly quiet, it is actually quieter than my laptop, it is difficult to tell that it is even on! My goal of reducing the noise of the system was a complete success. Of course, the system was running on idle, which means the power supply and graphics card card weren’t on. Under load, it will produce more noise, but even so, it will be much quieter than my current system.
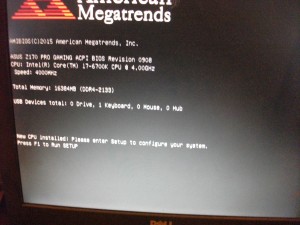
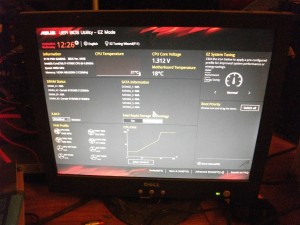
Successful POST and BIOS access. All components installed correctly and ready for action. I now just need to wait until my hard disk gets here and I can install the OS and my software.
I have prepared three candidate builds for my new machine, with a fourth build that is a final build, it is a combination of the other three.
The first build is minimialist, and involved keeping as many of my current parts as I can. I am just upgrading the RAM, Graphics Card, and Hard Drive. This is not optimal, since my current machine is over five years old, and it is unlikely that my processor (AMD Phenom 2 X6) would be up to the standards required of today’s games, even if it met my own personal requirements. I would also be unlikely to get the full benefit of the very powerful GTX 980 ti graphics card with my current machine.
The second build is a full new system, but I had tried to keep the price down as much as possible, such as by using an i5 instead of an i7 CPU, and 16GB of RAM instead of 32 GB.
The third build is also a full new system, but I have used higher spec parts and I have not paid as much attention to price. I was surprised to note that the difference in price between the lower end build and the higher end build was relatively slight, and so I decided to create a fourth build that was a combination of the two.
This final build has an i7 processor, which does not provide a huge benefit for gaming compared to the i5, but the addition of multi-threading provides 8 logical processes, compared to the 4 oh the i5. This will greatly benefit multi-tasking, something that is very useful for development.
I am using 16 GB of RAM for several reasons.
Firstly, 16GB is going to be enough for the forseeable future. Most games and development utilities would not come close to utilising 32 GB of RAM. Even 16GB is probably excessive for most tasks.
Secondly, I was surprised to discover that the newer Skylake chips do not support quad-channel memory, only dual-channel. It is surprising that the Skylake chips, being newer, don’t support quad-channel memory, when the older Haswell-E chips do. I had thought of getting 4 sticks of RAM (Possibly 4×8, giving 32GBs), but with just dual channel support, there is not as much reason to fill all of my DIMM slots.
I have also eliminated the backup hard drive from this build, since I can reuse the one I have for the time being.
I have also selected a cheaper motherboard. I really like the ROG boards from Asus, I have a ROG Crosshair IV in my current system and it’s excellent, but I feel that the extra features that the ROG board has compared to the Asus Z170 are mainly designed for Overclocking, which is something I would never do on a development system. The ROG Maximus VIII probably has a slightly higher build quality, and it can support slightly faster memory, but other than that, it’s basically the same.
The power supply that I selected is on “Tier 1”, the highest Tier, of the power supply rating system, so it should be fine.
WD Caviar drives are also reputable, so I should be ok there too.


![chrome 07/06/2016 , 06:18:52 AM Mixamo - Google Chrome [SCM]actwin,1908,542,1921,1041;](https://phoenixgamedevelopment.com/blog/wp-content/uploads/2016/06/PhoenixGameDevelopment-07_06_2016-06_18_52-AM.jpg)